Contents
The core loop
You spend hammers to hit eggs. Tougher eggs take more hits — a Normal egg breaks in one, a Century Egg takes a hundred. When an egg finally cracks it rolls a prize from its own table: gold, a multiplier, star pieces, feathers, bonus hammers, or a collection item.
Collection items are the only prize that moves you forward. Fill a stage's collection and the next stage unlocks. Everything else — gold, hats, better hammers — exists to make items arrive faster.
Hammers regenerate on a timer, so a session ends naturally rather than with a paywall. You start with 75.
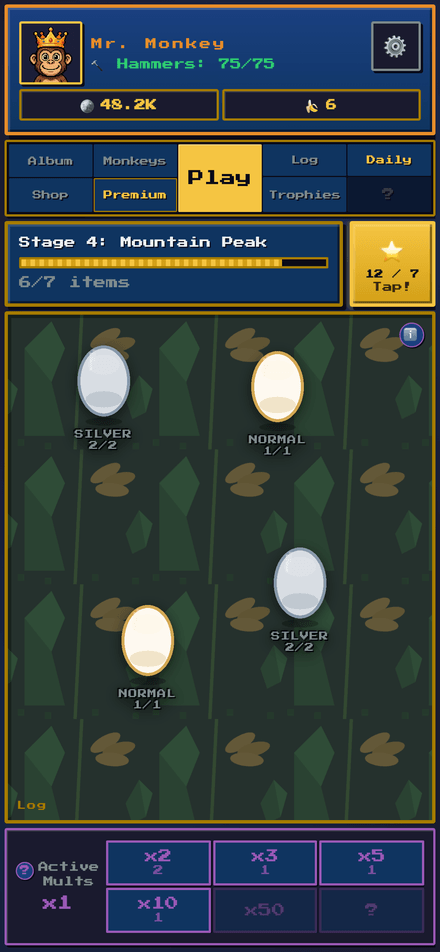
Egg tiers
Seven tiers. Rarer eggs take more hits but roll from strictly better tables — and the top tiers cannot come up empty at all.
| Egg | Hits to break | Available from | What makes it worth it |
|---|---|---|---|
| 🥚 Normal | 1 | Stage 1 | The bread and butter. The only egg that can be empty. |
| 🪨 Silver | 2 | Stage 1 | 2× gold, rarely empty, and the first egg that can drop bonus hammers. |
| 🌟 Gold | 3 | Stage 1 | Never empty, 1.5× gold, and roughly double a Normal egg's item chance. |
| 🔮 Crystal | 4 | Stage 3 | 3× gold and 4 star pieces per crack — the fastest route to Starfall. |
| 💎 Ruby | 9 | Stage 5 | 6× gold, 5 star pieces, and a much higher item rate. |
| 🖤 Black | 20 | Stage 9 | 10× gold, 7 star pieces, and the only egg that raises your max hammers. |
| 🌀 Century | 100 | Complete Mr. Monkey | 100× everything. A hundred hammers for one crack — and worth it. |
Rare eggs spawn on their own; you cannot buy one. What you can do is make sure you see them — the Spyglass upgrade (5,000 gold) labels each egg with its type and remaining hits, which stops you from dumping hammers into a Ruby you did not plan for.
Collections & stage tiers
Each stage has its own item set — Tropical Fruits, Sea Creatures, Crown Jewels and so on. Items come in Common, Uncommon and Rare, and duplicates convert to gold rather than being wasted.
Each stage is graded as you fill it:
| Tier | Collection filled |
|---|---|
| Bronze | 40% |
| Silver | 70% |
| Gold / complete | 100% |
Reaching Gold on a stage pays out bonus max hammers and a refill, which compounds: finishing stages properly makes every later stage cheaper to grind.
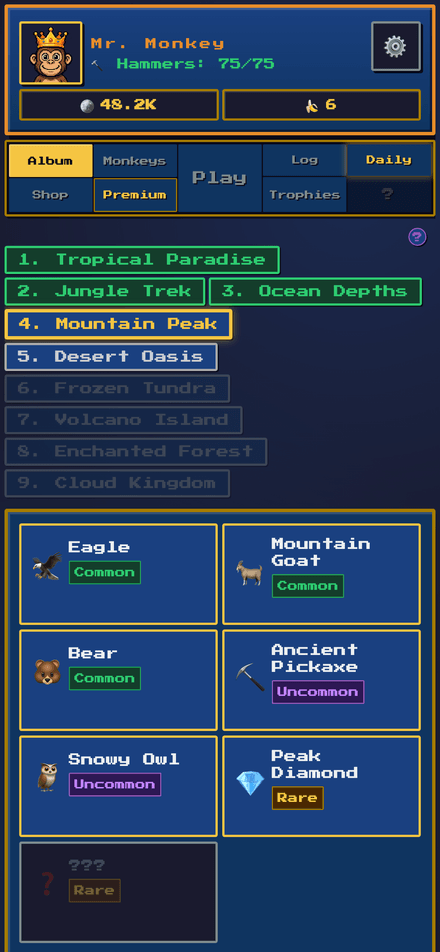
Gold, star pieces, feathers & bananas
- 🪙 Gold — the main currency. Buys hammers, hats, hammers upgrades and permanent shop upgrades.
- ⭐ Star pieces — collect 7 to trigger a Starfall, a bonus round that pays out across the whole tray.
- 🪶 Feathers — the anti-frustration currency. Feathers buy a specific missing item outright: 5 for a Common, 12 for an Uncommon, 30 for a Rare (rising slightly per stage). When one item is blocking a collection, this is the fix.
- 🍌 Crystal bananas — earned by completing stages and spent on unlocking new monkeys (9 per monkey).
The six monkeys
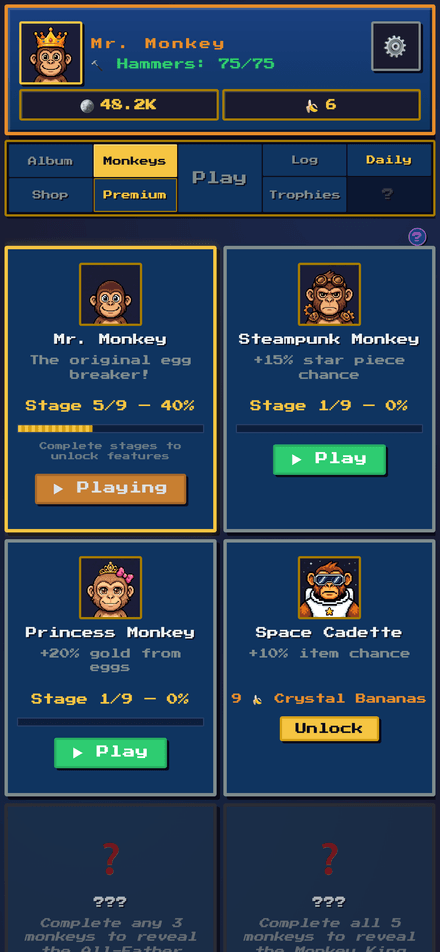
Each monkey is a separate world with its own stages, its own collection and a passive bonus that applies while you play as them. Progress is tracked per monkey, so switching never costs you anything.
| Monkey | Bonus | Stages | Items | Unlock |
|---|---|---|---|---|
| 🐵 Mr. Monkey | The original egg breaker — no bonus | 9 | 61 | Free from the start |
| 🔧 Steampunk Monkey | +15% star piece chance | 9 | 61 | 9 crystal bananas |
| 👸 Princess Monkey | +20% gold from eggs | 9 | 61 | 9 crystal bananas |
| 🚀 Space Cadette | +10% item chance | 9 | 61 | 9 crystal bananas |
| ⚡ Odin Grímnir | +10% gold, stars & feathers | 8 | 48 | Revealed after completing any 3 monkeys |
| 🐒 Sun Wukong | 72 Transformations — 15% chance of next-tier egg prizes | 9 | 61 | Revealed after completing all 5 others |
That is 353 collectible items across all six. If you are chasing completion, Space Cadette's +10% item chance is the most directly useful bonus; if you are grinding gold for hammers and hats, Princess Monkey pays better.
Hats
Hats are cosmetic and functional — the bonus applies whichever monkey you are playing.
| Hat | Effect | Cost |
|---|---|---|
| 👨🍳 Chef's Hat | 3% chance a hit costs no hammer | 15,000 gold |
| 👑 Crown | +10% gold | 30,000 gold |
| 🧙 Wizard Hat | +10% star pieces | 45,000 gold |
| 🎩 Top Hat | Unlocks the ×123 multiplier | 110,000 gold |
| 🏴☠️ Pirate Hat | +15% collection items | 180,000 gold |
The Pirate Hat is the completionist's pick and the Crown is the one that pays for everything else. Buy the Crown first — it funds the rest.
Hammers
Your hammer changes what your hits are worth. These are permanent, one-time purchases.
| Hammer | Effect | Cost |
|---|---|---|
| 🔨 Basic Hammer | Standard issue | Free |
| 🍗 Drumstick | +15% star pieces | 8,000 gold |
| 🦇 Bat | Fewer empty eggs | 12,000 gold |
| 🔮 Crystal | +20% feathers | 25,000 gold |
| ⭐ Golden | 2× gold from eggs | 120,000 gold |
| 🌈 Rainbow | +10% items, +15% gold | 220,000 gold |
| 🥒 Cucumber | 5% double hit, +25% gold | 300,000 gold |
| ⚡ Mjǫllnir | 3% chance of a full Starfall + 7 star pieces, +40% gold | 420,000 gold |
| ⚖️ Judge Gavel | 4% chance to break any egg instantly regardless of hits, +50% gold | 700,000 gold |
The Judge Gavel's instant-verdict roll applies to any egg — including a 100-hit Century Egg. That is the single best late-game effect in the game.
Tips that actually matter
- Buy the Spyglass early. At 5,000 gold it is the cheapest upgrade that changes decisions, because you can finally see what you are hitting.
- Save feathers for the last item in a set. Feathers scale with rarity, but the real cost of a missing Rare is the hundreds of hammers you would otherwise spend fishing for it.
- Stack multipliers before a rare egg, not after. The multiplier applies to the prize roll, so spend them where the table is best.
- Finish stages to Gold, not just to "unlocked". The tier reward is max hammers — a permanent increase to how much you can play per session.
- Do not ignore duplicates. They convert to gold scaled by rarity, so a duplicate Rare is a meaningful payout, not a miss.
- Switch monkeys when you stall. Bananas from a fresh world buy the unlock for a better bonus, and progress on the old one is kept exactly where you left it.
Try it now
Free in the browser — nothing to install.